
When you’re out at your local range or see competitors in the Olympics come to full draw, you may have noticed that there are different anchor points in archery. Some anchor at the cheekbone, while others go right up to their eye. So which one is correct?
The difference in anchor points in archery is primarily dictated by shooting style and personal preference. Each archer will find points of contact on their face to use as reference points for consistency, like the bone of the index finger touching the jawline, or the tip of the index finger touching the corner of the mouth.
In this article, we’ll look at the different anchor points for each style of shooting and what makes them specific to those styles.
Why Are There Different Anchor Points In Archery?
There are 4 distinctive styles of anchoring in archery:
- Traditional/ Barebow Shooting
- Olympic Style Target Recurve
- Compound Archery
- String Walking
Different styles of archery require different specialisations when it comes to aiming. So which anchor point you use will depend on which style of archery you choose and what works best for you.
The other major factor as to why anchor points vary is that the shapes of people’s faces are also very different. Therefore it takes some experimentation to find the reference points that work best for the individual.
What Is An Anchor Point In Archery?
While most people who start archery have some idea of what it should look like, so the act of drawing a bow may seem obvious. But soon enough, questions will start to form, such as, ‘Where do I stop drawing?’, or ‘Where do I put the string?’.
This is where the importance of anchor positioning comes in.
The anchor point is a point of reference.
Where you draw back and stop is your anchor point. Generally speaking, your arrows will go where you point them, but without an anchor point, you don’t know where you pointing! There will simply be too much variation in your shooting to get any kind of consistent groupings.
So consistency is key. You need to be touching the same reference spots every single time.
What Are The Different Anchor Points In Archery?
Generally speaking, the difference in anchor point location reflects the purpose of that particular style of archery:
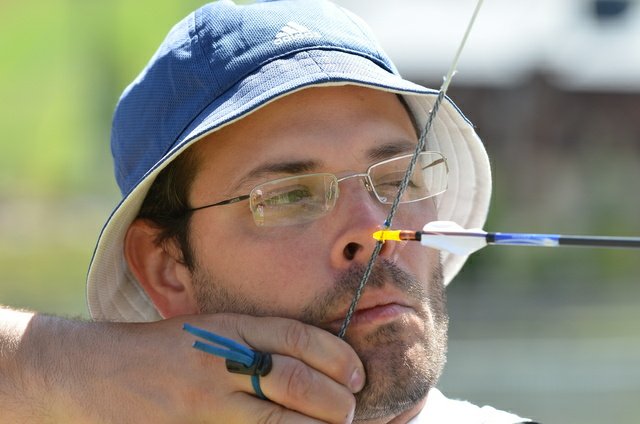
Traditional/ Barebow Anchor Point
The anchor point for a Traditional Bow or a Bare Bow is a little higher than the Olympic anchor point. This is because the bottom of the jaw position increases the distance between the eye and the anchor.

Traditional shooters generally place the tip of the index finger on the corner of the mouth, even using the canine tooth as a reference point.
Some archers take the anchor even higher and use the cheekbone as a reference. This makes it easier to use the tip of the arrow as the point of aim, which is especially useful for instinctive shooting.
Olympic Target Recurve Anchor Point
The anchor point for Olympic archers and target archers is the bottom of the jaw. The reason for this is that anchoring at the jawline gives the archer an anchor with 3 reference points instead of one:
- The top of the index finger contacts the jawline.
- The string touches the corner of the mouth
- The string touches the tip of the nose
These reference points make getting good alignment and the same shot consistency every time much easier.
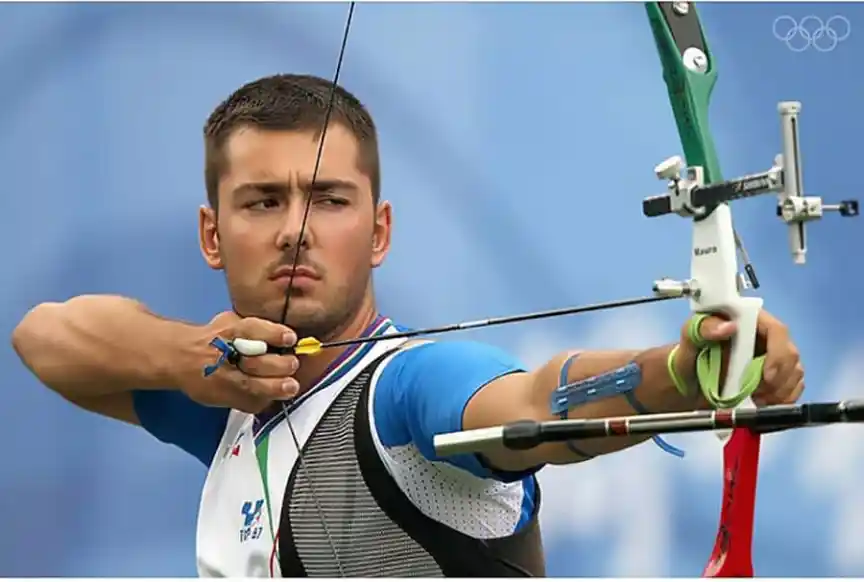
The fact that Olympic Recurve archers use sights compensates for the extra distance between the eye and the anchor. It also allows the archer to shoot at much greater distances.
Compound Bow Anchor Point
In compound archery, your anchor point is going to be different again because, in compound shooting, you’ll more than likely be using a release aid.
Setting your anchor point with a compound bow is even more crucial because you’ll need to get a consistent sight picture of two concentric circles through your peep and front sights.
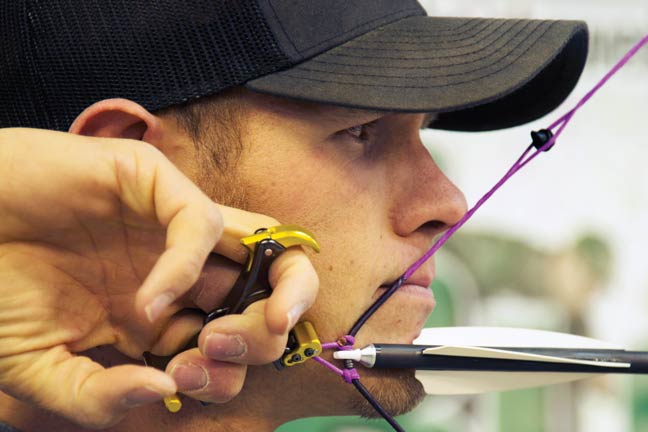
Good reference points for a compound anchor are the tip of the nose, the corner of the mouth and the side of the jawline.
The string should touch the tip of the nose, but as this is not the anchor, keep your string contact to a minimum as too much pressure can influence the arrow’s trajectory.
String Walking
String walking involves a very high anchor point that uses the cheekbone and the eye as reference points. The higher anchor reduces the point on distance and will influence the angle of your arrows as they launch.
The steeper the arrow’s angle, the shorter the point on distance will be. The length of the finger crawls will also be reduced when shooting shorter distances.
Anchoring near the eye can be quite dangerous, as the fletchings could catch and cause damage to the eye. Also not recommended for people who need to shoot wearing glasses.
Common Mistakes When Setting Your Anchor Point
1. Opening your mouth
If you’re using the edge of your jaw as a consistent reference point for your anchor, then opening your mouth is going to change that consistent point of contact.
Try to keep your teeth together throughout the entire shot process every single time to maintain consistency.
2. Moving your head
This is something that beginners often do. An anchor point relies on a stable head position. Rather than keeping their head still, they will tilt their head back or to the side. This will change the anchor point.
The archer needs to practice keeping the exact same head position. Even a few millimetres off will change the velocity of the arrow and the point of impact.
The other thing to watch out for is to not move your head towards the anchor, but always draw back to the anchor.
3. Fearing the String
This is often one that beginners experience. When pulling back to anchor they can be a little intimidated by the string coming so close to their face.
This is quite common because beginners will not know what to expect when they release and can often expect to get hit by the string.
The archer is in no danger whatsoever from the string, and most people get over this fear pretty quickly.
4. Leaving a gap between your hand and your face
Without setting your anchor on the side or under the jaw, you’re setting yourself up for a lot of inconsistency.
Leaving a gap between your draw hand and your jaw creates too much variation with your aim. It might work for shorter distances, but if you want to have any long-term success with archery, you will need to close that gap.
How To Find A Consistent Anchor Point In Archery
Finding the spot that works best for you can be a fairly simple process. Watch the video below where Ashe Morgan outlines the 5 steps to finding your perfect anchor point.
1. Hand To The Neck
Bringing the hand to the neck instead of to the front of the face will help you get into a better position to be able to lift the hand up onto the jaw.
2. Correct The Hook
Make sure that you’re hooking your fingers correctly over the string. Try not to grip and squeeze your hand into a fist, but allow the string to sit into the fingers while the back of your hand stays flat.
Squeezing your hand won’t allow you to get close enough to the neck to feel that nice, relaxed anchor point.
3. Head Position
As we mentioned earlier, head position is key in getting a consistent anchor point. Getting the head in the right position will allow you to keep your neck long enough for you to get your hand under the jaw.
Focusing on the postural muscles of the upper back and bracing your core will help you to keep a tall spine so your head is aligned correctly.
4. Rotate with the Draw Side
At full draw, there should be a straight line down your bow arm and across the back of your shoulders to your draw arm elbow.
If you’re using an anchor point that sits at the front of the chin, then the chances are that you won’t be fully rotated on the draw side.
Rotating the shoulder on the draw side will get your chest to expand and align your shoulders correctly. This makes it easier to find the better anchor on the underside of the jaw.
Conclusion
Whatever style you choose to do, anchor points in archery will always serve the same purpose. One of reference and consistency.
That is why the anchor point must be one of the first things you learn when starting archery. Without it, your arrows will simply not go where you want them to.
Within your chosen style of archery, try to find an anchor point that your body feels comfortable with. One that matches the rhythm of your draw, your posture and your level of shoulder mobility. You shouldn’t be trying to get to a point with your anchor that feels painful in your shoulder joints.
Your anchor point should feel like a natural position that you can get to easily and repeatedly.
0 Comments