
Learning how to make arrows for a longbow is a vital skill for any archer dedicated to the traditional side of archery. In this article, we’ll delve into the intricacies of crafting your arrows, ensuring they are perfectly suited for your longbow. From selecting the right shaft and feathers to precise tapering and fletching, every step is crucial in making a high-quality longbow arrow.
Key Takeaways:
- Select the Right Materials: Choose the appropriate wood like cedar or pine for the shafts, and decide between natural feathers or synthetic vanes for fletching.
- Precision in Crafting: Pay close attention to tapering the shafts correctly, evenly attaching the fletching, and ensuring the nocks are properly aligned.
- Testing and Adjustments: Test your arrows to check their flight and make necessary adjustments for improved accuracy.
- Proper Storage: Store the arrows in a dry place and conduct regular checks for maintenance.
How To Make Arrows For A Longbow
Crafting arrows for longbows requires patience, precision, and an understanding of the materials and tools involved. Each component plays a crucial role in the arrow’s performance.
Tools You Wil Need
To make wooden arrows for longbows, you’ll need a variety of tools that cater to different stages of the arrow-making process. Here’s a compiled list of essential tools based on information from multiple sources:
- Tile Saw: Used for cutting and tapering the nock at the end of the arrow shaft.
- Knife: Essential for shaping and tapering the arrow, particularly at the tip where the arrowhead will be attached.
- Rotary Cutter: Useful for cutting the feathers to the right shape and size for fletching.
- Feather Cutting Template: Helps to cut feathers uniformly, which is crucial for the arrow’s flight.
- Emery Paper: For smoothing and finishing the shaft and the arrowhead.
- Arrow Straightener: To ensure the arrow shafts are perfectly straight, which is vital for accurate flight.
- Taper Tool: Used to taper the ends of your arrow shafts for mounting points and nocks.
- Arrow Saw or Hack Saw: For cutting wooden shafts to the desired length.
- Wooden Arrow Sealer: To protect the arrow shaft from moisture and other environmental elements.
- Dip Tube: Used in conjunction with the sealer to apply an even coating.
- Glue-On Points and Nocks: These need to match the diameter of your arrow shafts (no need if using traditional)
- Fletching Jig: To accurately attach the fletches (feathers) to the arrow.
- Feather Fletching and Fletching Glue: For attaching the feathers to the shaft.
- Spine Tester: To measure the flexibility of the arrow shaft, ensuring it matches the bow’s draw weight.
- Self-Heading Cutting Mat and Shaft Shaper Collet: Useful for protecting surfaces during cutting and for shaping the shafts.
Selecting and Preparing the Shaft
The journey of longbow arrow making begins with the selection of the right shaft. Traditional longbow archers often favor wooden shafts for their authentic feel and performance.
Cedar, known for its balance of strength and flexibility, is popular. However, when selecting wood arrows, ensure the straightness and uniformity of the shafts and that they match the bow.
Choose the Grain Wisely
The grain of the wood is extremely important in arrow making, particularly for wooden arrows. Grain runout, which is the way the grain runs along the length of the arrow shaft, is a critical factor.
This is because a wooden arrow tends to break along its grain. If an arrow breaks upon release, the orientation of the grain will influence which direction the shards fly, which can have safety implications for the archer.
Properly aligning the grain with the cock feather minimizes the risk of the arrow breaking and causing injury.
Cutting the Shaft To Length
Cutting an arrow to the correct length is a crucial step in arrow making, as it directly impacts the arrow’s performance, balance, and safety.
The length of an arrow should typically be about 2 to 3 inches longer than the archer’s draw length to prevent the arrow from being too short on full draw, which can cause it to slip off the arrow rest or even lead to a dangerous dry fire situation.
To cut the arrow, first, measure and mark the desired length on the shaft, taking into account the insert or nock that will be added.
Use a specialized arrow saw or a fine-toothed hand saw to make a clean, straight cut. After cutting, it’s important to ensure that the cut end of the shaft is perfectly square. This can be done using an arrow squaring tool or careful sanding.
Straightening the Arrow
Straightening a wooden shaft is a delicate process that requires attention to detail. Once your shafts are cut, using a taper tool, carefully point taper the ends of the shaft to fit the nocks and arrowheads.
This tapering not only aids in fitting other components but also contributes to the arrow’s aerodynamics. Remember, the shaft’s spine – its ability to bend and flex – is crucial. It must match the bow draw weight to ensure optimal flight.
Crafting and Fitting Nocks
Nocks are essential for connecting the arrow to the bowstring. In traditional longbow arrows, nocks are often created by carving directly into one end of the arrow shaft.
This requires precise cuts and careful sanding to create a snug fit for the bowstring. For those preferring modern methods, glue-on plastic nocks offer an alternative.
Either way, ensure the nock is aligned with the shaft for straight flight. Once you’ve placed the nock onto the shaft, make sure you get a cloth and wipe away any excess glue.
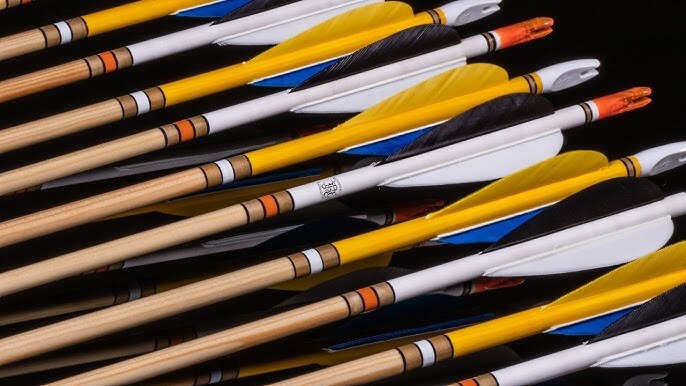
Fletching the Arrow
Fletching, the process of adding feathers to the arrow, is critical for its stability and accuracy. Traditionally, feathers are used, but modern archers sometimes opt for synthetic materials. Here’s how to fletch your arrows:
- Choosing Feathers: Select three feathers for each arrow, ensuring they are from the same wing (either all left-wing or all right-wing) to maintain consistent flight patterns.
- Attaching Feathers: Using a fletching jig, align each feather along the arrow shaft. Apply a thin line of glue along the quill of the feather. Carefully clamp it onto the shaft, starting from the nock end and working towards the arrowhead. Repeat this process for all three feathers, evenly spacing them around the shaft.
The fletching process, while meticulous, adds a personal touch to your arrows and is essential for ensuring they fly straight and true.
Sealing and Finishing
Once fletched, seal and stain your wooden shafts to protect them from moisture and wear. A coat of varnish or polyurethane works well.
Allow the sealant to dry completely before handling the arrow further. This sealing not only protects the wood but also enhances the arrow’s overall appearance, adding a polished look to your handmade creation.
Attaching Arrowheads
The type of arrowhead you choose depends on your intended use – target shooting, bowhunting, or medieval style archery. Here’s a simple guide:
- For Wooden Shafts: Glue-on field points are common. Apply hot melt adhesive to the tapered end of the shaft and the base of the point. Align and attach the point, rotating it to distribute the glue evenly.
- For Modern Shafts: If using carbon or aluminum shafts, screw-in points might be more appropriate. Ensure the point’s thread matches the shaft’s insert before attaching.
Remember, the weight and style of the arrowhead can affect the arrow’s balance and flight, so choose accordingly.
Quality Control and Testing
Once your arrow is assembled, it’s crucial to perform quality checks:
- Check for Straightness: Roll the arrow on a flat surface to ensure it’s straight. Any bends or warps can affect the arrow’s flight.
- Inspect Fletchings: Ensure the feathers or vanes are securely attached and evenly spaced.
Finally, test fire a few arrows to see how they perform. This will give you an idea of any adjustments needed for optimal accuracy.
Related: What Did Medieval Arrows Look Like?
Storing and Caring for Your Arrows
Proper storage is vital for maintaining your arrows’ condition. Keep them in a dry place, away from extreme temperatures.
A quiver or a specially designed arrow box is ideal for protecting the fletchings and keeping the arrows straight. Regular inspections for damage or wear can extend the life of your handmade arrows.
FAQs
Can I use any wood for arrow shafts?
The best woods for arrows are cedar, ash, and pine, known for their strength and flexibility. Avoid woods that are prone to warping or splitting.
How do I choose the right spine for my arrow?
The spine, or flexibility, of the arrow must match your longbow’s draw weight. Use a spine tester or consult a reputable archery equipment dealer for guidance.
Is it necessary to use a fletching jig?
While you can attach feathers by hand, a fletching jig ensures even spacing and alignment, making the process easier and more precise.
What's the Best Way to Ensure the Straightness of an Arrow Shaft?
To ensure an arrow shaft’s straightness, roll it on a flat surface and gently straighten any bends using your hands or an arrow straightening tool.
How Can I Choose the Right Feather for Fletching?
Select feathers based on your shooting preferences: larger feathers for stability or smaller feathers for speed; natural feathers are preferred for traditional archery, while synthetic vanes suit wet conditions.
Conclusion
Crafting arrows for a longbow is a blend of art and science, requiring patience, skill, and attention to detail. The skills you develop and refine along the way contribute to your growth as an archer, deepening your connection to this ancient practice.
The satisfaction of using arrows made by your own hands, tailored to your longbow and shooting style, is incomparable.
It brings a sense of completeness to your archery experience, uniting the bow, the arrow, and the archer in perfect harmony.
So, take these tips, apply them and enjoy the process, and the unique satisfaction that comes from shooting arrows that are truly your own creations.
Remember, practice makes perfect, so don’t hesitate to refine your technique as you gain more experience.
0 Comments