
If you’re an avid longbow archer and looking to connect further with the romanticism of archery, then there’s no better place to start than by making your own longbow arrows.
It’s a trade that has been around for thousands of years, and one that’s helped supply archers on battlefields throughout history.
Fletching arrows can be an extremely rewarding process and one that can easily be learned if you follow a few guidelines. Tracking down the right materials and using the right tools will also help give your arrows that authentic feel.
But before you rush off to make your own longbow arrows, here’s that list of tools and materials you’re going to need:
- 36″ Wooden Arrow Shafts (ash) – 3/8″ diameter
- Arrow Sealant
- Natural Pine Resin
- Bees Wax Pellets
- Copper Acetate
- Silk Thread
- Left Wing Turkey Feathers
- 3/8″ hand-forged iron heads
- Tile Saw
- Knife
- Rotary Cutter
- Feather Cutting Template
- Emery Paper
Once you have all of the above assembled, it’s time to start the process of building your Longbow arrows.
What Is The Best Wood To Make Arrows Out Of?
The best woods for making arrows are woods that are light and can hold their straightness over time. Popular woods include ash, polar, cedar, oak, hazel, pine, and beach wood. For the example in this article, we’re going to be using ash.
How To Build Longbow Arrows: A Step-By-Step Guide
Step 1. Preparing Your Arrow Shaft
1. Cut Your Arrows Down To Size
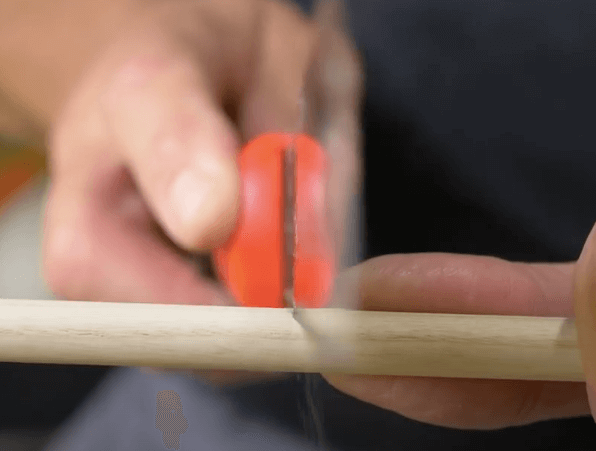
You’re going to be cutting down your 36″ ash shafts to a 30″ shaft. Measured from the base of the head to the base of the nock. These arrows are going to be for a Longbow that draws 90lbs at 28″.
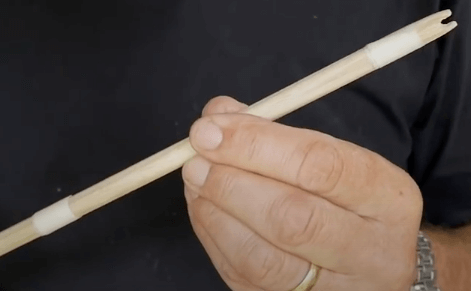
2. Cut and Taper the Nock
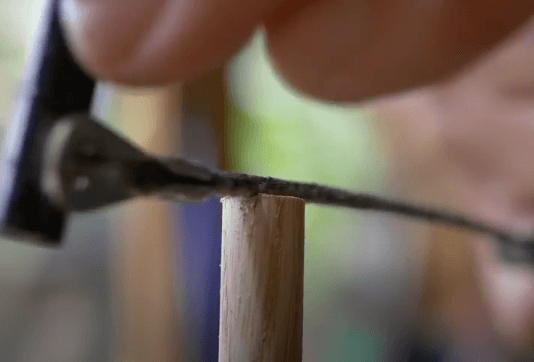
The arrow that you’re going to be making is a self-nocking arrow, which means that the nock groove is cut directly into the wood, so you’ll need to use the tile saw to cut the groove. You’ll need to mark a line in pencil on the base of the shaft as a guideline.
Use your bow string to help you fine-tune the width of the nock groove. Next, use a file and some sandpaper to taper the nock.
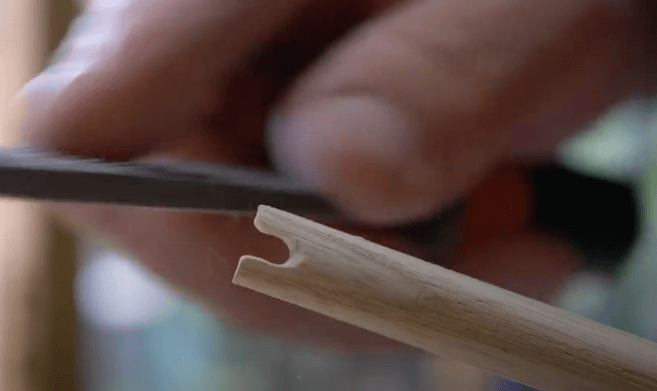
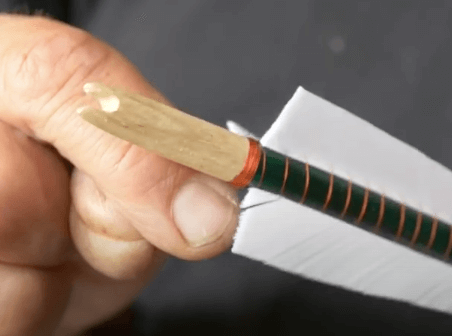
3. Cut a Shouldered Taper for the Arrow Tip
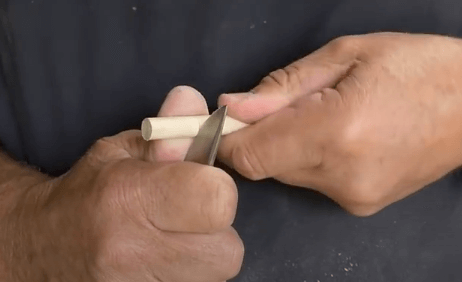
At the end of the shaft use a knife to taper the end. Score a groove around the diameter of the shaft to mark where you’ll start cutting.
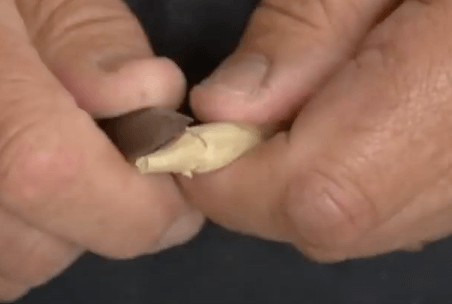
Make sure that you don’t go too narrow as you want the iron head to be a snug fit.
4. Seal your Arrow Shaft
Using the arrow sealant and a cloth, lightly coat the arrow shaft. This will waterproof the arrow and prevent any warping due to wet weather.
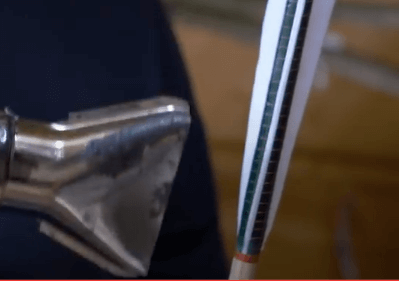
5. Mark off an area for the Fletches and Resin
Using masking tape, mark off the area at the nock end of the shaft so that you clearly know where you are going to apply the resin and fletches. The length of this space will vary depending on the length of the fletches, but it’s usually around 6 – 8 inches.
Step 2. Fletching Your Arrow
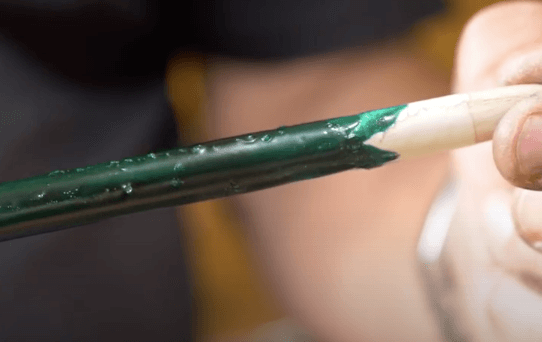
1. Mix the Resin, Bee’s Wax, and Copper Acetate
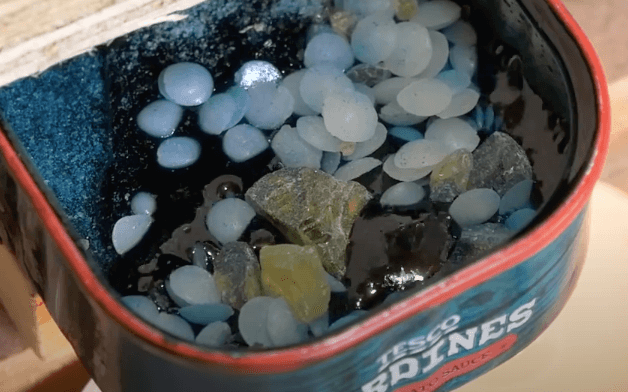
In a small tin, place 1 tsp pine resin, 1 tsp bee’s wax pellets, and half a tsp of copper acetate. Then heat the tin over a couple of candles.
Stir until melted. This might take a bit of experimentation to get the mixture just right!
2. Apply the Resin Between the Marked Out Areas
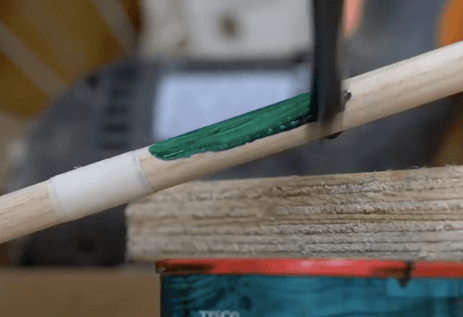
Between the two pieces of masking tape, use a paintbrush to lightly apply your (by-now green) resin. Then leave it to set.
Check back to see if the coating has been evenly applied. If not, then reheat the resin using a hairdryer or a heat gun. This should ensure that the shaft is evenly coated.
3. Cutting the Feathers
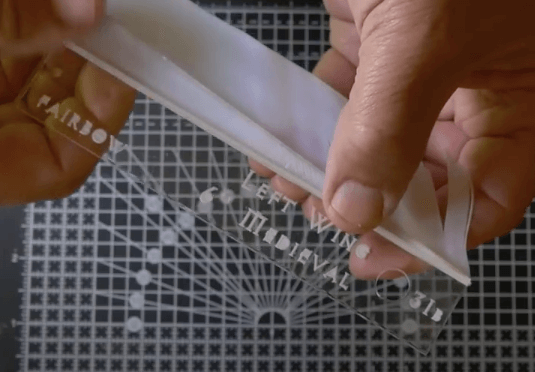
First, align your feather along the feather stencil, then using the rotary cutter, carefully cut the shape of your fletches.
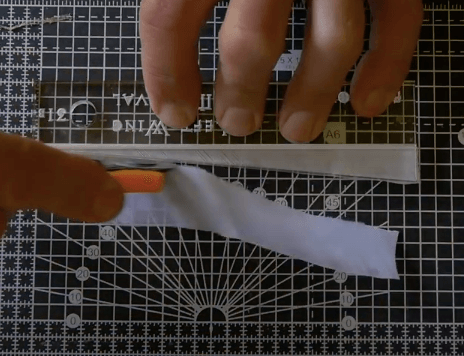
You can also remove the quill of the feather to make it more flexible.
An additional note on which feathers to use: Left-wing feathers will spin your arrow to the left, and right-wing feathers to the right. All 3 feathers you apply to your arrow shaft need to be either all left-wing or all right-wing, otherwise, your arrow’s flight will be erratic.
4. Attaching the Fletches

You can use a fletching jig, but for this article, we’ll attach the fletches by hand. You’ll need to heat the resin again to ensure that the feathers will stick.

Remember to re-heat the resin so that the fletches adhere to it.
Use a piece of masking tape to bind the end of the feathers to the shaft at the bottom of the resin. You can align the fletches as you go up the shaft when you’re binding.
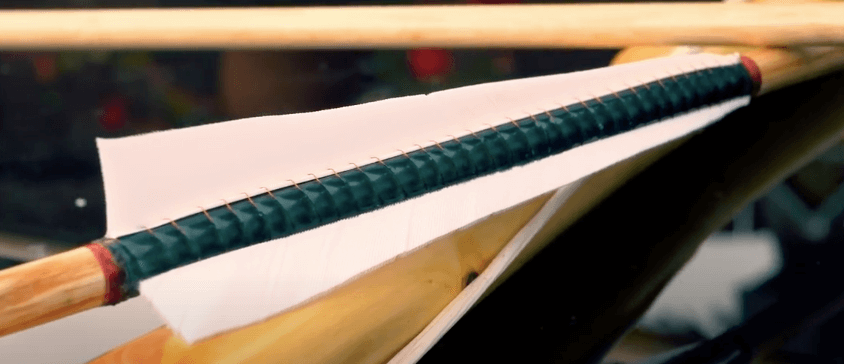
5. Binding the Fletches
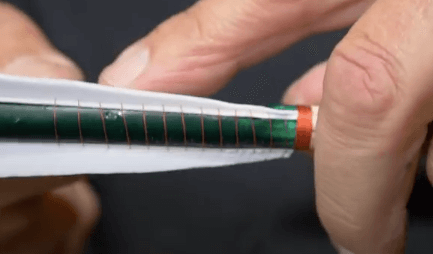
Starting at the base of the fletches, create an L-shape with the end of the silk thread. Then wind the thread around the L-shape to anchor the binding to the shaft.
Work your way slowly up the feathers leaving roughly a 2mm gap between threads. When you reach the top, form another L-shape in the thread and wind your silk thread around it to secure it.
Add a bead of glue to the thread to finish off the binding.
6. Heat the Resin
The final thing you need to do is to heat the resin one last time. This will make the resin melt and flow all around the bindings to seal everything in.
Step 3. Attaching the Iron Heads
1. Roughen the Arrow Heads
Using some emery paper, roughen inside the socket of the arrowhead to prepare it for the glue.
2. Attach the Iron Head
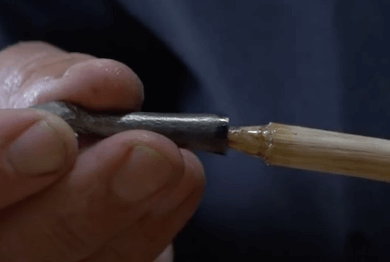
A two-part epoxy resin is ideal for this. Mix the glue, then give the tip of the arrow a thick coating of epoxy.
Then slide on the iron head, making sure that it’s square to the shoulder. Then you can wipe away the excess glue. Press the tip of the arrow down firmly onto a tabletop and hold for a few seconds to make sure that any air trapped inside the socket is not going to push the tip off.
And that’s it! Once you have the finished product, I would recommend applying a little oil to the arrow shaft before taking it out into the field for some practice.
There are many various methods that you can use to make medieval Longbow arrows. Some even include using the same authentic medieval tools originally used.
0 Comments