
Understanding the intricate details of archery is a pursuit that requires dedication, precision, and a profound comprehension of its various components. Among these elements, arrow spine holds a crucial place. Learning how to read an arrow spine chart can greatly improve your chances of of helping you find the correct spine and proper arrow for your bow.
Reading an arrow spine chart involves understanding the relationship between the arrow’s length and the weight needed to properly flex or “spine” the arrow during flight.
To read an Arrow spine chart, start by locating your arrow length on the chart, which is typically listed down the left side. Then, move horizontally across the chart to find the poundage of your bow, which is usually listed along the top. The intersection of these two values will give you the recommended arrow spine size. Note that different manufacturers might have variations in their charts, so always refer to the specific chart provided by the arrow manufacturer.
Additionally, consider factors like point weight, fletching type, and bow design, as these can also influence the ideal arrow spine for your setup.
In this article, we’ll take a deeper dive into all things arrow spine chart to help you get find the correct arrow spine for your set-up.
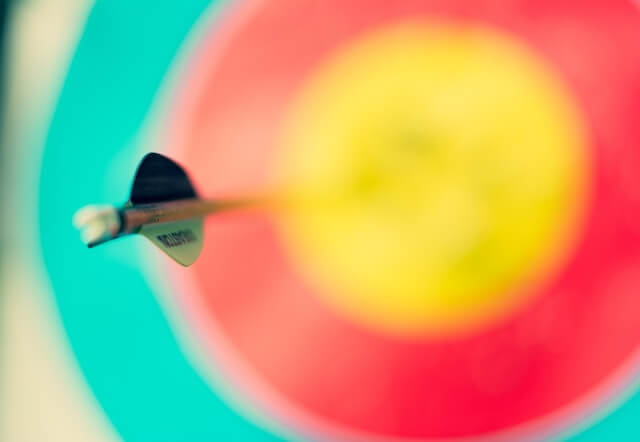
How To Read And Understand An Arrow Spine Chart
Before we get into the specifics of how to read an arrow spine chart, we must first understand the concept of ‘spine’ when it comes to archery.
Understanding Arrow Spine
The arrow spine refers to the flexibility or stiffness of an arrow shaft. It directly impacts the flight trajectory, accuracy, and overall performance of an arrow when shot from a bow.
A properly matched arrow spine ensures optimal transfer of energy from the bow to the arrow upon release, resulting in consistent and accurate shots.
Mastering this concept is vital for archers aiming to enhance their shooting skills and achieve precision in their sport.
By comprehending how different factors influence arrow spine and learning how to interpret an arrow spine chart effectively, archers can select arrows tailored for their specific needs.
Overview of an Arrow Spine Chart
An arrow spine chart serves as a valuable tool in the selection process by providing guidance on matching arrows with specific draw weights and lengths.
The chart typically showcases graphical representations with axes representing draw weight (X-axis) and arrow length (Y-axis), along with corresponding numeric values indicating different levels of stiffness or flexibility.
The intersection point on the chart reveals which range of spine values suits your equipment setup best. By referring to this guide, you can make informed decisions about choosing arrows within the recommended range for optimal performance.
Understanding Arrow Spine
Definition and Concept of Arrow Spine
Arrow spine refers to the flexibility or stiffness of an arrow shaft, and it plays a crucial role in determining the performance, accuracy, and consistency of your shots.
The spine essentially measures how much an arrow bends when subjected to the force exerted by the bow upon release.
A higher spine value indicates a stiffer arrow, while a lower spine value indicates a more flexible arrow. This measurement is typically denoted by numerical values such as 300, 400, or 500.
Factors Affecting Arrow Spine
The arrow spine is influenced by several factors that must be taken into account for accurate selection. Understanding these factors will help you choose arrows that match your specific shooting requirements.
Draw Weight: One significant factor affecting arrow spine is the draw weight of your bow—the force required to fully draw back the bowstring.
Draw Length: Draw length, which is the distance from the bowstring to the pivot point of the bow when at full draw, influences the length of the arrow you should use.
Higher draw weights usually demand stiffer arrows to ensure proper flight and energy transfer upon release.
Arrow Length: The length of an arrow also affects its spine characteristics. Longer arrows tend to have more flex due to their increased length between two fixed points (the nock and point).
Conversely, shorter arrows exhibit less flex because they have less distance between these fixed points.
Point Weight: The weight of your chosen arrow point influences its front-of-center balance and can impact its overall flight characteristics.
Heavier points can make arrows behave stiffer due to increased forward weight distribution during their trajectory.
Bow Type: Different bows, like recurve, compound, and longbows, affect arrow flight differently. Each type may need various arrow spines for the best performance.
This is due to their unique designs, cam systems, brace heights, and limb deflections. Considering these factors helps understand arrow spine thoroughly.
This understanding aids in making informed choices using an arrow spine chart. Thus, you can select suitable arrows for your setup.
Components of an Arrow Spine Chart
Graphical representation
An arrow spine chart is a graphical representation that helps archers understand the relationship between draw weight, arrow length, and arrow spine values.
It consists of two axes, the X-axis representing draw weight and the Y-axis representing arrow length.
These axes intersect at various points, which correspond to different spine values. The graph provides a visual tool for selecting arrows based on specific bow setup requirements.
X-axis (draw weight)
The X-axis on an arrow spine chart represents draw weight, which is measured in pounds. This axis typically ranges from lower to higher values, reflecting the increasing force required to achieve a full draw on the bowstring. As you move along this axis, you encounter different draw weights that correspond to specific points on the chart.
Y-axis (arrow length)
The Y-axis represents arrow length in inches. It accounts for variations in archer preferences and bow setups by allowing them to choose arrows of different lengths that suit their shooting style or specific equipment requirements.
The Y-axis encompasses a range of lengths from shorter arrows to longer ones as you ascend or descend along its scale.
Spine values (numeric scale)
The spine values are represented by numeric scales marked on either side of the chart. These values indicate the stiffness or flexibility of an arrow’s shaft when subjected to pressure from a drawn bowstring.
Typically measured in deflection units (e.g., 300, 400), lower numbers signify stiffer shafts while higher numbers suggest more flexible ones.
Interpretation key
To aid in understanding and utilizing an arrow spine chart effectively, it often includes an interpretation key that categorizes different zones based on spine values and their corresponding colors.
a) Stiff zone
The stiff zone, usually indicated by a red color, represents arrows with stiffer spine values. This means that the arrow will be too stiff for a given draw weight and arrow length combination.
Selecting arrows in this zone may result in decreased accuracy and performance issues, as the shaft’s stiffness does not adequately match the bow’s power.
b) Weak zone
Conversely, the weak zone is depicted by another distinct color, such as blue. Arrows falling within this range possess shafts that have a weaker spine and are too flexible for the specific draw weight and arrow length combination.
Choosing arrows from this zone can lead to erratic flight paths and reduced accuracy due to excessive bending.
c) Optimal zone
The optimal zone on a spine chart is usually highlighted, often in green. It shows the spine values that best match a specific draw weight and arrow length.
Arrows within this range provide the best performance. This includes ideal arrow shaft flexing during release and enhanced accuracy.
Static and Dynamic Spine
Arrow spine can be evaluated in two primary ways: static spine and dynamic spine.
Static Spine
This refers to the arrow’s resistance to bending when a specific weight is applied. It’s measured by placing the arrow on two points 28 inches apart and hanging a 1.94-pound weight in the middle.
The static spine is the measurement of the bend or deflection of the arrow in inches, and it’s often used to categorize arrows into different spine sizes.
Lower numbers indicate stiffer arrows, while higher numbers indicate more flexible arrows.
Dynamic Spine
Dynamic spine involves the arrow’s flexing as it’s shot, affected by draw weight, arrow length, point weight, and fletching. It’s vital for tuning since it impacts the arrow’s flight and accuracy.
While static spine helps categorize and select arrows, dynamic spine fine-tunes your setup. It ensures proper arrow flex and quick stabilization in flight.
How to Read an Arrow Spine Chart
A: Determine your draw weight and arrow length measurements.
Before delving into an arrow spine chart’s intricacies, it is crucial to accurately determine your bow’s draw weight and the desired length of your arrows.
These measurements serve as foundational information required for making informed choices based on an arrow spine chart.
B: Locate the corresponding values on the chart’s axes.
Once you have determined your draw weight and arrow length, locate these values on their respective axes of the arrow spine chart.
1: Draw weight on the X-axis. Find your bow’s draw weight measurement along the X-axis of the chart.
This will enable you to identify where it falls within its range. 2: Arrow length on Y-axis.
Next, identify your chosen arrow length measurement along the Y-axis of the chart. By doing so, you can pinpoint its precise location on the chart.
3: Identify the intersection point. After locating your draw weight and arrow length values on the chart, find the point at which they intersect.
This intersection point holds crucial information regarding arrow spine selection.
C: Analyze the intersection point in relation to spine values.
Once you have identified the intersection point, examine its position with respect to the spine values indicated on either side of the chart.
1: If it falls in the optimal zone, select arrows with that spine value range.
If your intersection point aligns with the optimal zone on the chart, you can confidently choose arrows within that specific spine value range. This ensures a harmonious match between your bow’s power and arrow flex.
2: If it falls into the stiff or weak zone, make necessary adjustments. In case your intersection falls within either the stiff or weak zone, adjustments are necessary.
Consider selecting arrows with different spine values that correspond to a more suitable zone. Fine-tuning your selection will lead to improved shooting performance and accuracy.
Fine-Tuning Your Selections
Additional factors influencing arrow selection
While an arrow spine chart provides valuable guidance for choosing appropriate arrows, it is essential to consider other factors that may influence your final selection.
1: Bow type and its specific requirements.
Different bows may have unique requirements concerning arrow spine values.
Certain bow types such as compounds or traditional recurves may call for specific arrows to optimize performance. Consult manufacturer recommendations or seek advice from experienced archers in such cases.
2: Point weight (tip weight) preferences for desired performance characteristics.
The weight of your arrow’s tip (point) can affect its flight characteristics.
Experimenting with different point weights can fine-tune your setup and ensure desired results in terms of speed, trajectory, and accuracy.
Consider personal preferences while selecting point weights but keep in mind any limitations imposed by equipment specifications.
- Stiffer Arrow (Lower Number): These arrows have less flex during flight, typically resulting in a straighter flight path but hitting to the left of the center of the target due to their stiffness.
- More Flexible Arrow (Higher Number): These arrows exhibit more flex during flight, which might result in a more erratic flight path and hitting to the right of the center of the target due to their flexibility.
Practical Tips for Using an Arrow Spine Chart Effectively
Consult manufacturer’s recommendations for specific bow and arrow combinations.
Different manufacturers may offer specific guidelines and recommendations regarding arrow spine selection based on their equipment.
It is advisable to consult these resources in conjunction with the use of an arrow spine chart.
FAQs
What do the numbers on arrow spines mean?
The numbers on arrow spines, such as 340 or 400, represent the arrow’s stiffness. Specifically, it indicates how much the arrow deflects (bends) under a standard weight. Lower numbers indicate stiffer arrows, while higher numbers indicate more flexible arrows.
What arrow is heavier 340 or 400?
The 340 arrow is stiffer and typically heavier than the 400 arrow. Lower spine numbers correlate with stiffer and often heavier arrows.
How do I know what arrow spine to use?
To determine what arrow spine to use, consult an arrow spine chart. This chart considers your bow’s draw weight and arrow length to recommend an appropriate spine. Also, consider factors like your bow type, shooting style, and arrow tip weight for fine-tuning.
What is the difference between 400 and 500 spine arrows?
The main difference between 400 and 500 spine arrows is their stiffness and potentially their weight. A 400 spine arrow is stiffer and possibly heavier than a 500 spine arrow. The specific number indicates the arrow’s deflection in inches when a 1.94-pound weight is suspended from its center, with the ends supported 28 inches apart.
Conclusion
Mastering the art of reading an arrow spine chart is a valuable skill for any archer seeking optimal performance.
Understanding the arrow spine chart’s graphical representation and color-coded zones helps archers choose arrows that match their bow setup.
Fine-tuning selections with factors like bow type and point weight enhances shooting precision. Embrace the knowledge from the chart and enjoy consistently accurate shots, hitting your target with more precision every time!.
0 Comments